Unified pages
- Pages
- Project Validator button
- Project Validator output messages
Project Validator
The "Project Validator" tool check and list the widgets that will be rendered differently into Web client. User can double click each warning message reported from the Project Validator to open the pages that contain the reported widgets to take the appropriate action. However, user action is not mandatory, the project can be downloaded anyway and the unsupported property will not be managed from the Web Client.
Note that the current version of the Project Validator checks the widget's web compatibility. It is not checking the entire project (e.g. missing tags or Javascript errors)
Example
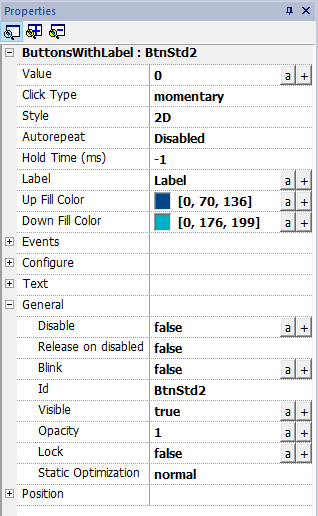
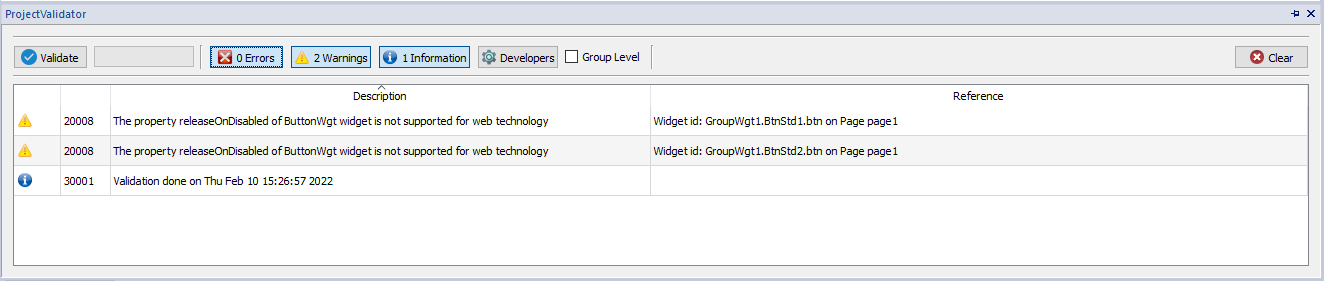
The "Release on disabled" property is not supported on the Web client.
- When the property is set to "False", HMI device and Web client will work in the same way and project validator will not report any message.
- When the property is set to "True", the Project Validator will report the warning message. In the case that the project will download to the HMI device, the Web client simply will not manage the "Release on disabled" property.
Group Level
When the "Group Level" is checked, the Project Validator will report the group name that contains one or more widgets with the unsupported properties. A double click will select the grouped widget.
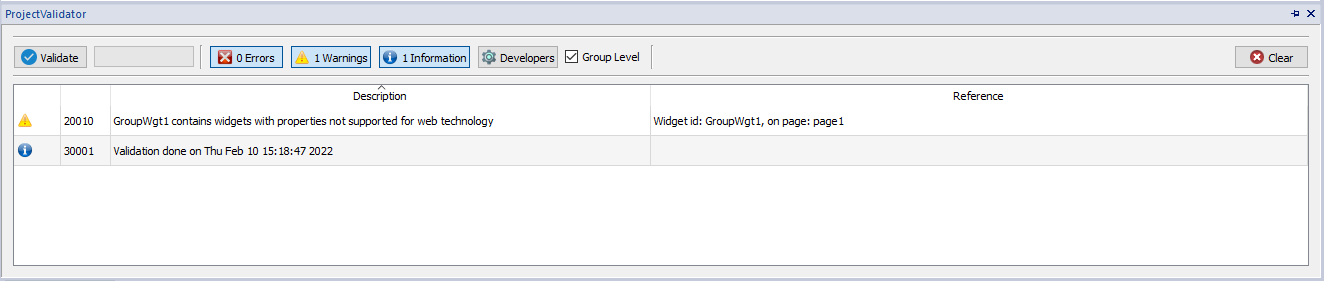
When the "Group Level" is not checked, the Project Validator will report the list of the not supported properties. A double click will select the widget that have the unsupported property.
Differentiated pages
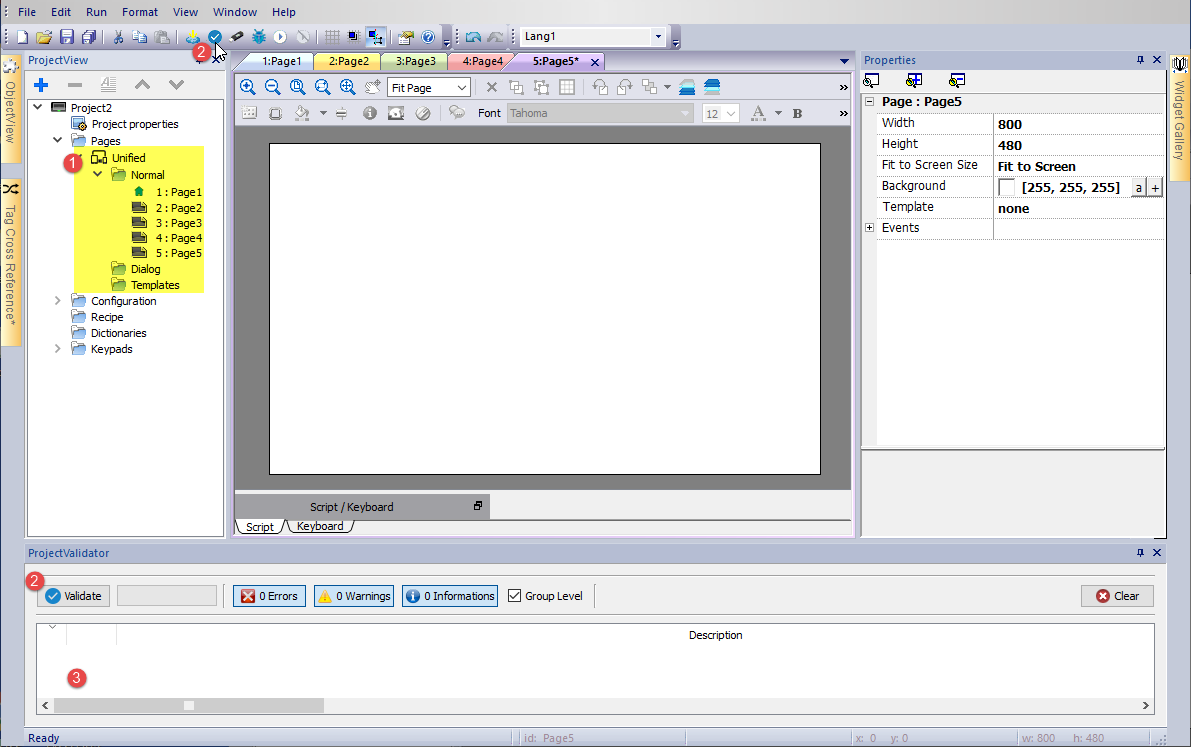
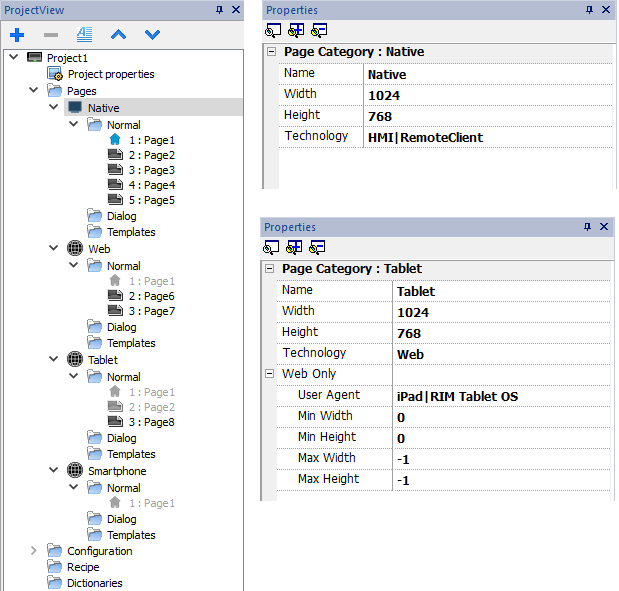
If a project needs to have different pages for the HMI device, web client, tablet client, etc., there is the possibility to add different folder to contain the pages to use on the different clients. Right click on the page folder to add a new category of pages. For each category, you have to define the below properties where Technology, User Agent and Min/Max are filter parameters to define the web clients that belong to the category.
| Property | Description | |||||||||
|---|---|---|---|---|---|---|---|---|---|---|
| Name | The category name | |||||||||
| Width, Height | The default size used when create a new page | |||||||||
| Technology |
Identify the clients that can use these pages. It can be a combination of:
|
|||||||||
| User Agent |
It is a regular expression that identifies the web browsers that can display the pages of the category. The user-agent of the web client has to match with this parameter. Example:
|
|||||||||
| Min Width Min Height Max Width Max Height |
Defines the size of the display of the Web browser that has to show the pages of this category. The default, Min=0 and Max=-1, is meaning any size. |
If the definition of a Web client belongs more than one category, are choices the pages that are available inside the closest category.
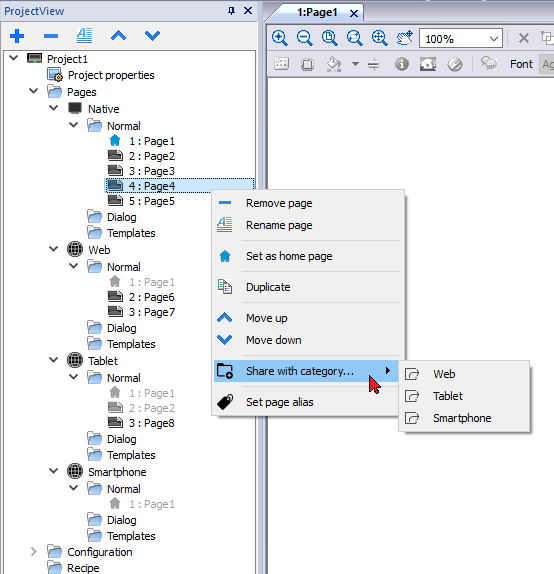
Shared pages
Pages can be shared between the categories. Shared pages are highlighted in gray color and can be opened indifferently from each category.
Home Page
From the context menu of the page is possible to define the Home page of the category. The Home Page is the first page that is displayed in the browser type defined in the category and defines the starting point for your web project. The pages you can access from the home page depend on how other pages are linked in the project.
When security is enabled, you can specify a different homepage for each group of users. In this case, this setting will be overwritten. See "User management and passwords" for details.
Using pages shared between categories could be useful the alias page parameter to load the appropriate customized page.
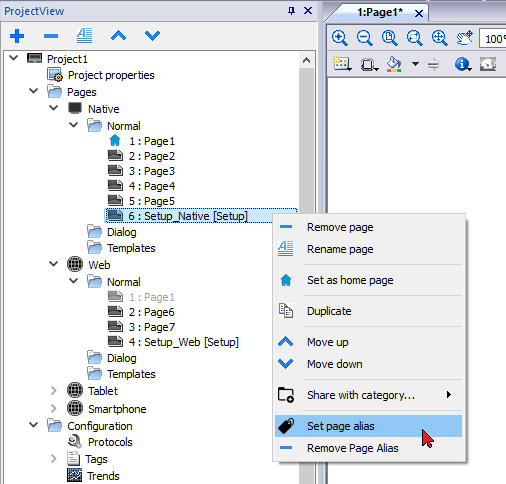
For example, you can have a shared "Page1" common to all categories. Page1 will be shown on both the HMI device and on Web Client, but from this page, you need to add a macro to load a customize setup page. This means a macro that load the page "Setup_Native" on HMI device or a different page "Setup_Web" on a web client.
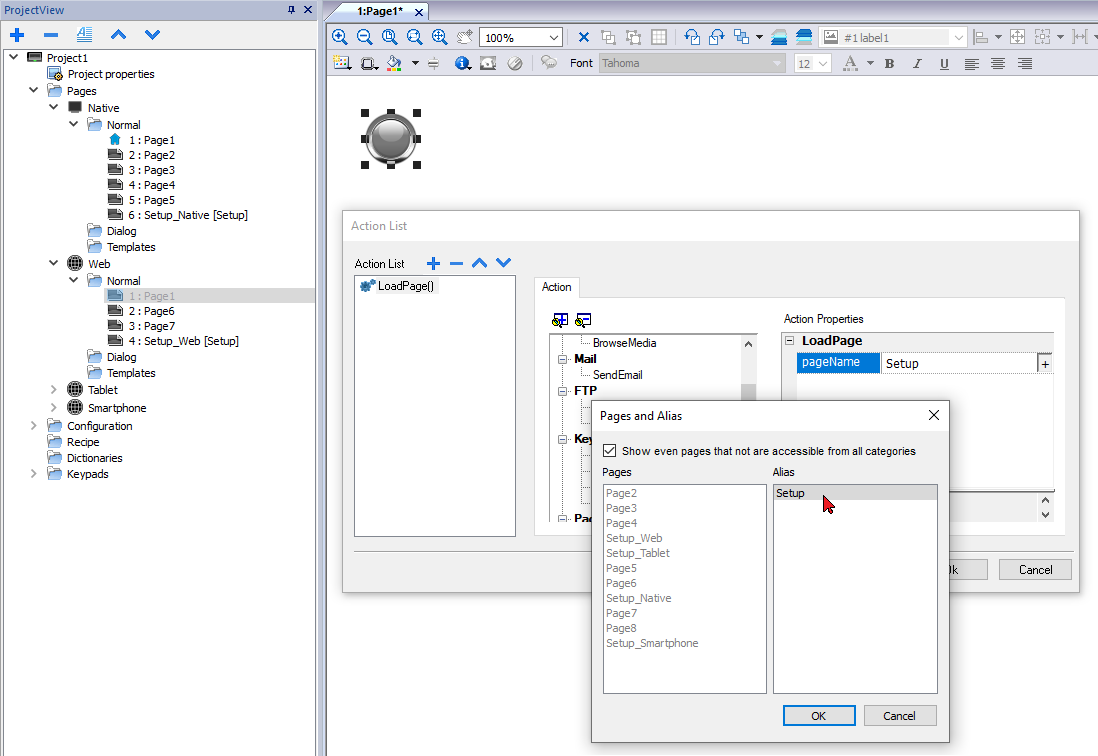
To load a different page depending on the client used, you can add the same alias to both "Setup_Native" and "Setup_Web" pages and use the alias name in the LoadPage macro.
Set the alias page:
Use the alias page: