Retentive Memory variables
System Variables - Retentive Memory protocol allows to create Tags that point to a memory area whose content is maintained when HMI is powered off.
The physical support for retentive memory is based on FRAM technology.
Important: Not all HMI devices include FRAM memory. If FRAM memory is not available, persistency is supported using user memory storage (Flash or hard disk drive). Flash technology has a limitation in the maximum number of write operations. The use of Flash as storage media for retentive memory with frequent write operations may damage the memory components. Check the HMI device datasheet for the availability of FRAM memory.
Important: Retentive memory is 16 KB flat memory area organized in bytes and accessible through an offset. Refer to schema below.

Retentive memory vs. recipes storage
Recipe data is saved in flash memory
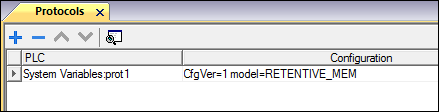
Protocol Editor Settings
From PLC Model list of Protocol Editor dialog, select Retentive Memory.
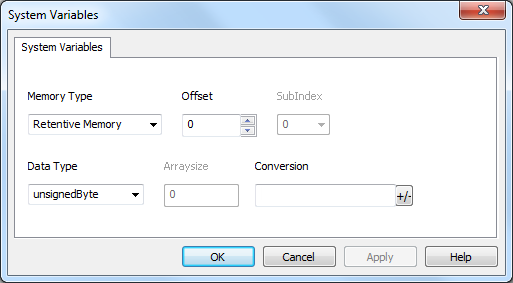
Tag Editor Settings
Path: ProjectView> Config > double-click Tags
- To add a tag, click +: a new line is added.
- Select System Variables from the Driver list: tag definition dialog is displayed.
| Element | Description | ||||||||||||||||||||||||||||||||||||||||||
|---|---|---|---|---|---|---|---|---|---|---|---|---|---|---|---|---|---|---|---|---|---|---|---|---|---|---|---|---|---|---|---|---|---|---|---|---|---|---|---|---|---|---|---|
|
Memory Type |
Fixed to Retentive Memory |
||||||||||||||||||||||||||||||||||||||||||
|
Offset |
Offset address where tag is located. Range: 0-16383 |
||||||||||||||||||||||||||||||||||||||||||
|
SubIndex |
This parameter allows resource offset selection based on selected Data Type | ||||||||||||||||||||||||||||||||||||||||||
| Data Type |
Note: to define arrays. select one of Data Type format followed by square brackets like “byte[]”, “short[]”… |
||||||||||||||||||||||||||||||||||||||||||
|
Arraysize |
Note: number of bytes corresponds to number of string characters if Encoding property is set to UTF-8 or Latin1 in Tag Editor. |
||||||||||||||||||||||||||||||||||||||||||
|
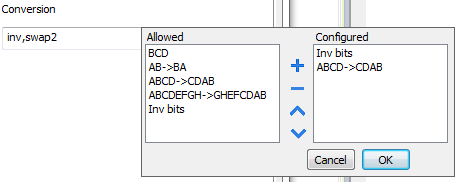
Conversion |
Conversion to be applied to the tag.
Depending on data type selected, the list Allowed shows one or more conversion types.
Select conversion and click +. The selected item will be added to list Configured. If more conversions are configured, they will be applied in order (from top to bottom of list Configured). Use the arrow buttons to order the configured conversions. |
||||||||||||||||||||||||||||||||||||||||||
.
Cleaning Retentive Memory
Use the ClearRetentiveMemory action to clear the content of the retentive memory.
Tip: Use this action to set the memory content to a known status at any time.
See Actions > Tag Actions section of main manual for more details.
JavaScript interface for this action is:
project.clearRetentiveMemory();
Preserving Retentive Memory at project download
When a project file is downloaded to an HMI, or when the active project is modified, the content of retentive memory is usually deleted.
If is needed to preserve the content of retentive data at project download or update, select the Keep retentive data on project update option in the settings tabs of the HMI device.
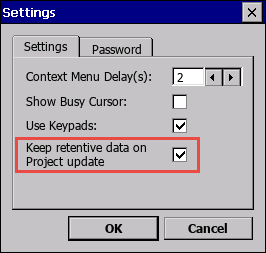
This setting will be ignored if Delete runtime dynamic files option is selected from Download to Target window.

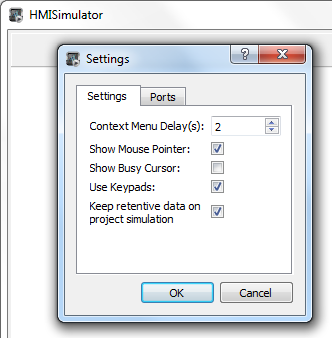
Preserving Retentive Memory in Simulator
Simulator of JMobile Studio supports the retentive memory. To enable retentive memory during project simulation use the option "Keep retentive data on project simulation" in context menu.